A player profile on Tornelo represents a player’s digital identity on the platform. It serves as a hub for all their profiles from different platforms and showcases their progress, electronic trophies, and rating progress on Tornelo.
How to edit profile?
Player profiles can be searched under Players on Tornelo community page.
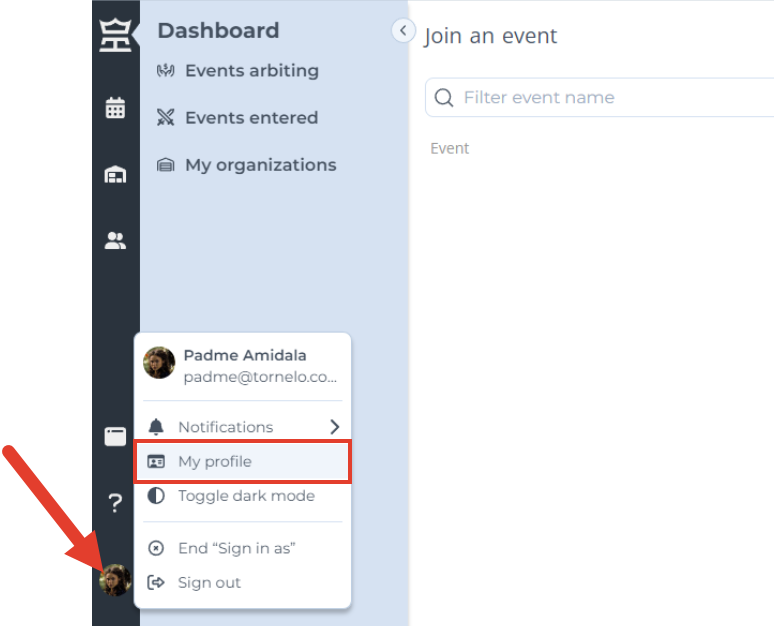
1. Go to your Player profile – click on the Avatar in the bottom left corner of your screen and select My profile in the menu
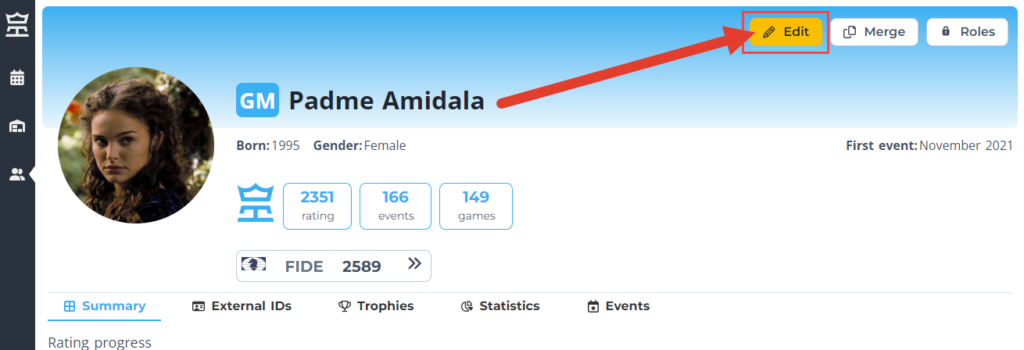
2. On the profile page click on the Edit button
3. In the pop-up window update any personal information you wish
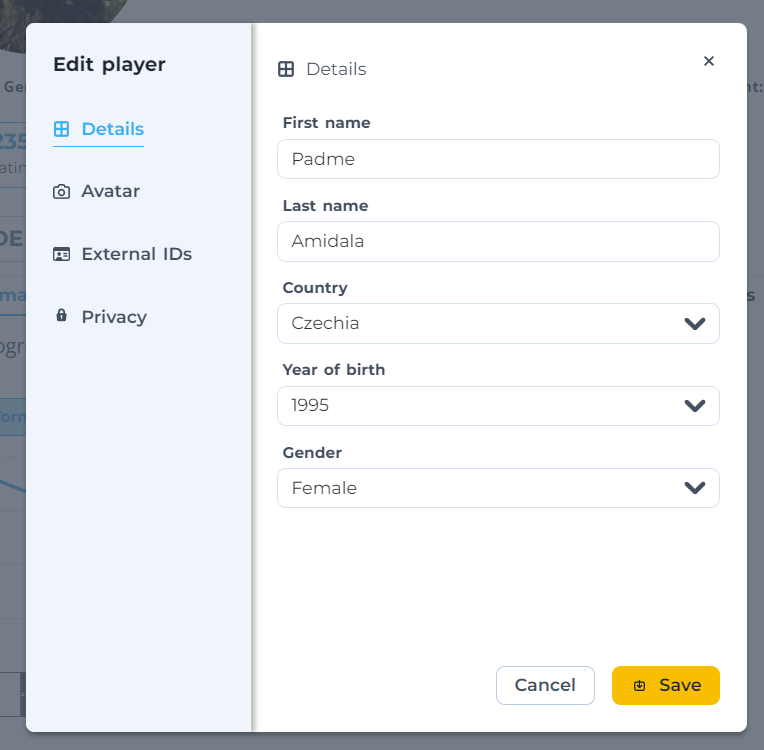
4. Click Save
Switch to different tabs to update your:
- Avatar or background colour
- Connect your external profiles (eg. national rating)
- Privacy settings
Troubleshooting
Don’t see the profile in your Avatar menu? Don’t see the Edit button on the player profile page?
This means you don’t own your profile. Someone else created it and has control over it.
How is it possible? What to do?
- You created your profile with a different account. → Try to sign in to Tornelo with different email address and check again.
- Arbiter created your profile. → Ask the Arbiter to invite you to take control over your profile. Ask the Arbiter or Organization of the first Event that shows up on your profile.
Can anyone else edit your data?
All players who register to Events on Tornelo via the Tornelo registration process give the Arbiter permission to update their data, such as year of birth or gender. Arbiters usually do this, when the fields are empty and they need this information to assign players into sections or award special prizes.
This means your data is protected, nobody can make any updates to your profile without your explicit permission.
Tip
Want to control your profile with different accounts? Click on Roles, enter your email adress and send yourself an invitation.